



























For years, the most powerful way to customise a Shopify Plus checkout was to edit a file called checkout.liquid. You could add scripts, change layouts, inject tracking and rewrite wording, and many stores did, sometimes in ways nobody documented. That era is over. Shopify has moved checkout customisation to a structured system called checkout extensibility, and the old approach is being retired page by page.
If your store still depends on pasted code in checkout or on the order confirmation page, you need to know what has already stopped working and what to build instead.
This guide explains Shopify checkout extensibility for store owners and developers: what it consists of, which old methods are gone, how to rebuild common customisations, how tracking works now and how to plan an upgrade without losing sales. We lean on Shopify’s developer documentation for the facts and dates, and we point out the places where plan limits or recent changes mean you should check the current docs.
What is Shopify checkout extensibility?
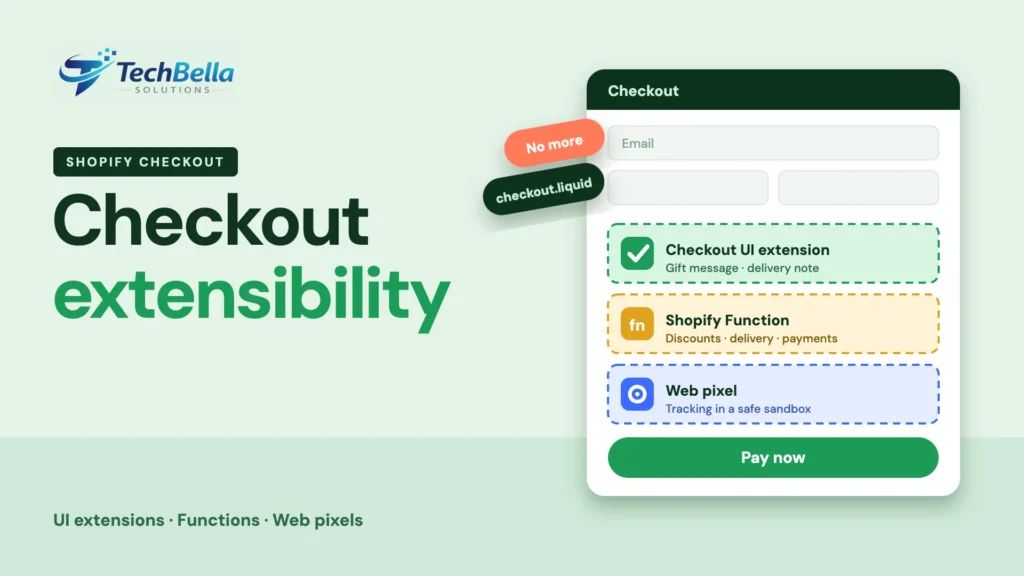
Checkout extensibility is Shopify’s current way to customise the checkout without editing its core code. Instead of changing the page itself, you add supported building blocks that Shopify runs for you inside a stable, upgrade-safe checkout. Shopify’s documentation lists four main customisation options:
- Checkout UI extensions. Small pieces of interface that merchants place in the checkout through the checkout editor in the Shopify admin. Typical uses include pre-purchase and post-purchase offers, custom banners and fields, client-side validation and address autocomplete.
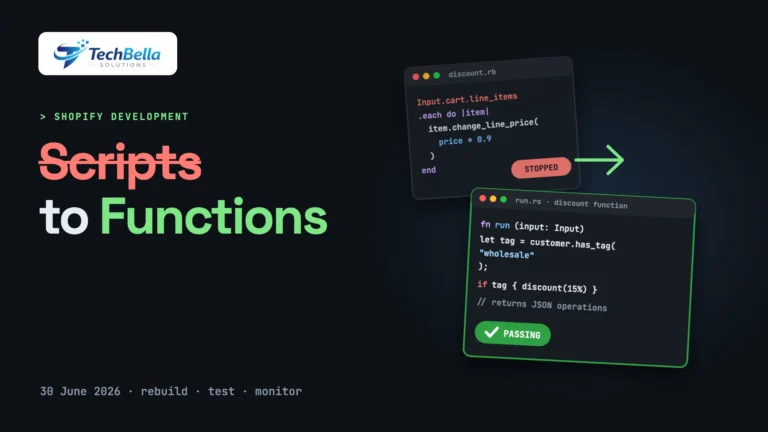
- Shopify Functions. Backend logic for discounts, delivery options, payment options, validation and more. This is where much of the old Scripts logic now lives. See our guide to moving from Scripts to Functions.
- Web pixel extensions. The supported way to run tracking and analytics code, replacing script tags and “additional scripts”.
- Payments extensions. For payment providers that integrate with Shopify’s checkout.
Branding is handled separately: Shopify’s documentation says the header and footer can be customised using the GraphQL Admin API’s checkout branding types, alongside UI extensions.
What has been switched off
The deadlines matter, because code that was working a year ago may have silently stopped. According to Shopify’s developer documentation on checkout:
- checkout.liquid is unsupported for the Information, Shipping and Payment checkout steps.
- checkout.liquid and additional scripts were sunset for the Thank you and Order status pages on 28 August 2025. For stores on Shopify Plus, script tags on those pages ended on that date.
- For stores that are not on Plus, script tags on the Thank you and Order status pages are sunset on 26 August 2026.
- Stores still using these methods must upgrade to Shopify Extensions in Checkout.
Shopify also recommends planning the in-checkout, Thank you and Order status upgrades together, so you do not end up maintaining two technology stacks and can apply styling once. You can read the details in Shopify’s checkout documentation.
Why Shopify made the change
The reasons are practical, and they are mostly good for merchants once the migration is done:
- Stability. Custom code pasted into a core page can break whenever Shopify updates checkout. Extensions run in a supported, versioned system.
- Speed. Shopify can optimise checkout without worrying about arbitrary third-party code.
- Security. Sandboxed extensions limit what injected code can see and do, which matters when the page handles payment details.
- Merchant control. Extensions can be placed and configured in the checkout editor, so non-developers can adjust them without a code deployment.
- Upgrades. New checkout features arrive without needing to re-merge your customisations.
The cost is that you cannot do everything you used to, and some customisations require a rebuild.
Step 1: Audit what your checkout does today
Start by listing every customisation, even small ones. Check:
- Theme and checkout code in version control or in the theme editor, including any leftover snippets.
- Additional scripts and script tags in settings.
- Apps installed in the past that inject code into checkout or the order status page.
- Tracking and marketing tags, such as pixels, affiliate codes and surveys.
- Customer-facing extras: gift messages, delivery date pickers, custom fields, trust badges, upsells and legal checkboxes.
- Business logic: discounts, payment and delivery rules.
Put each item in a table with its purpose, its owner, whether it still works and what replaces it.
Step 2: Choose the right replacement for each item
Different needs map to different tools:
| Customisation | Replace with |
|---|---|
| Banner, message or trust badge | Checkout UI extension |
| Extra field (gift message, delivery instructions) | Checkout UI extension, with data saved to the order |
| Upsell before or after purchase | Checkout UI extension or an app that provides one |
| Address autocomplete or validation | Checkout UI extension and, where needed, a validation function |
| Discount rules | Shopify Function or a discount app |
| Hiding or renaming payment or delivery options | Payment or delivery customisation function |
| Analytics, ads and pixels | Web pixel extension or the sales channel’s own integration |
| Header, footer, colours, fonts | Checkout branding settings |
| Post-purchase survey | UI extension on the Thank you page, or an app |
Always check the current documentation, since availability of individual extension points can differ by page and plan.
Step 3: Rebuild tracking the right way
Tracking is the part most likely to have broken without anyone noticing. If your conversion tags used to live in additional scripts on the Thank you page, they may have stopped firing, and ad platforms and analytics will show fewer conversions than you really had. The supported approach is web pixels, which run in a sandbox and receive standard customer events such as checkout started and purchase completed. Many advertising and analytics platforms have official Shopify integrations that use pixels, so check those first before writing your own.
After any change, verify tracking with a real test order: confirm that purchase events appear in each platform, with the right value, currency and order ID. Compare the numbers with Shopify’s own reports for a week. Also consider consent: your pixel setup should respect your customers’ privacy choices under the rules that apply to you, such as the GDPR or India’s data protection law.
Step 4: Build or install UI extensions
Checkout UI extensions are built as part of a Shopify app, using Shopify’s tooling and its UI components, which Shopify renders inside checkout. A typical build:
- Create or reuse an app and generate a checkout UI extension with Shopify CLI.
- Choose the extension point, the place in checkout where the block can appear.
- Build the interface with Shopify’s components, not arbitrary HTML, which is part of why checkout stays fast and safe.
- Read and write data using the provided APIs, such as reading the cart or saving a note or attribute to the order.
- Deploy, then add the block in the checkout editor and publish.
If an app already offers the feature, install it instead. Buying a well-maintained app is often cheaper than building and maintaining your own.
Step 5: Test the whole journey
Test as a customer on a development store or in a safe environment, then again with a real low-value order on the live store:
- Desktop and mobile, including iOS Safari and Android Chrome.
- Guest checkout and logged-in customers.
- Each payment method and each delivery option.
- Discount codes, automatic discounts and gift cards.
- Every market and currency you sell in.
- The Thank you and Order status pages, including tracking events and any survey.
- Accessibility: keyboard navigation and readable contrast on your branding choices.
- Speed: compare time to complete checkout before and after.
Also test what happens when something fails: if an extension cannot load, the customer should still be able to pay.
A worked example: a gift message extension
Suppose a merchant wants customers to add a gift message in checkout, and the warehouse to print it on the packing slip. Before building anything, write the requirement: which orders can have a message, the maximum length, whether the message is optional, where it appears in checkout, where it is saved and how the warehouse sees it.
A checkout UI extension can show a text field at an appropriate point, validate the length and save the value as an order attribute or note. The warehouse process then reads that attribute from the order. Notice what makes this robust: the data is saved in a supported place on the order, the interface uses Shopify’s components, and the merchant can place or move the block in the checkout editor.
Compare that with the old approach of injecting a field with custom code and hoping the value survived to the order.
Measuring the result
After the migration, compare against a baseline from before: checkout completion rate, payment failure rate, average time to complete checkout, support tickets about checkout and conversion by device. Give it a couple of weeks to smooth out day-of-week effects, and remember that seasonality and campaigns can distort the picture. If a metric drops, check the extension, tracking and payment steps first before blaming the new design.
Mistakes we see in checkout upgrades
- Leaving tracking until last. Conversion data drops, and ad optimisation suffers for weeks.
- Copying old code into new places. If an old snippet does something because of a past campaign, ask whether it is still needed.
- Ignoring the Thank you page. It is where surveys, upsells and tracking often live.
- Underestimating plan differences. Some capabilities depend on your Shopify plan, so check your plan against the current documentation before you design a solution.
- Over-customising. Every extension is something to maintain. Prefer fewer, clearer blocks.
- Forgetting international markets. Languages, currencies and taxes should be tested everywhere you sell.
Keeping Shopify checkout extensibility maintainable
Shopify checkout extensibility works best when each customisation has a clear purpose and an owner. Keep a simple register of every extension, the problem it solves and the date it was last tested. When Shopify releases changes, review the register first, and retire anything the platform now does natively.
If you work with an agency, ask how they test Shopify checkout extensibility changes before they go live, and who is responsible when an app update changes behaviour. A short, regular review is cheaper than an emergency fix during a sale.
Upgrading your Shopify checkout?
We inventory old checkout and Thank you page code, rebuild it as extensions, functions and pixels and test the whole journey so you do not lose conversions.
Frequently Asked Questions
What is Shopify checkout extensibility?
It is Shopify’s supported way to customise checkout using checkout UI extensions, Shopify Functions, web pixel extensions and payments extensions, instead of editing checkout.liquid or pasting scripts into checkout pages.
Is checkout.liquid still supported?
According to Shopify’s documentation, checkout.liquid is unsupported for the Information, Shipping and Payment steps, and checkout.liquid and additional scripts were sunset for the Thank you and Order status pages on 28 August 2025. Stores still using them must upgrade to extensions.
When do script tags end on the Thank you and Order status pages?
Shopify’s documentation says script tags were sunset for Shopify Plus stores on 28 August 2025 and are sunset for non-Plus stores on 26 August 2026.
How do I add tracking now?
Use web pixel extensions or the official Shopify integration of your analytics or advertising platform. Test with a real order and compare the figures with Shopify’s own reports.